こんにちは、モバイルアプリを開発しています高橋です。交互に仕事場に猫二匹がやってきて監視されながら仕事しています。
先日リリースしたとある iOS アプリは、
- 機能は機能ごとに分割して実装したい
- 依存解決のコードは自動生成したい
- ライトウェイトな設計としたい
というコンセプトの元、コンパイルセーフな DI フレームワークの uber/needle を使い、uber/RIBs のようなアプリケーションアーキテクチャでデザインすることで、各コンポーネントをコンパクトに分割することができました。
Needle や RIBs が前提知識となります。そのため本記事ではざっと Needle と RIBs を解説したのちに、具体的なコードを交えて SwiftUI + UIKit (Storyboard) ハイブリッド対応でかつ Needle + RIBs インスパイアなアプリケーションアーキテクチャの一端を解説してみます。
動作環境
- Xcode 13.2
- Swift 5.5
- macOS 12 Monterey (macOS 11 BigSur でも確認済み)
Needle
まず、簡単に Needle を説明します。
Needle は各モジュールをコンポーネントとしてツリーで表現し DI することができるものです。
コードジェネレーターの cli ツール→①と、ジェネレートされたコードを引き回すライブラリ→②がセットになっており、①をビルド時に実行するようにして使います。
Swift Package Manager でも Carthage でも CocoaPods でも使うことができます。ここではサクッと①を Homebrew 、②を Xcode の Swift Package Manager で入れてみます。
①Needle コードジェネレータ
% brew install needle
次に、Build Phase で Compile Sources の前に以下を設定します。
mkdir "$TEMP_DIR"
touch "$TEMP_DIR/needle-lastrun"
SOURCEKIT_LOGGING=0 needle generate $SRCROOT/アプリフォルダ名/Needle.swift アプリフォルダ名
※Carthage で入れた場合はチェックアウトディレクトリの中にあるので、それ (Carthage/Checkouts/needle/Generator/bin/needle) を実行します。
ビルドしてみると、registerProviderFactories() という空のメソッドが生えている Needle.swift ファイルができます。このメソッドは後ほど使用します。
Needle.swift ファイルを .xcodeproj に入れたら、下準備完了です。
コラム: SOURCEKIT_LOGGING=0
SourceKit ロギングをサイレントモードにしています。 通常 Xcode はログを表示しますが、Xcode で作業している際のノイズを減らすために入れています。
②Needle ライブラリ
ライブラリの方もプロジェクトに入れます。Xcode → File → Add Packages... より Needle のレポジトリ(https://github.com/uber/needle.git)を指定して入れます。

Needle の使い方の簡単な説明をするとこのようになります。
- コンポーネントをツリー構造にします。ルートだけ
BootstrapComponentのサブクラスにします。 - 親コンポーネントで定義したコンポーネントを Dependency にするので、上位コンポーネント(ルートとか)で諸々注入します。
- 子コンポーネントでは親で注入されたものを
protocol Dependencyで定義することで利用することができます。 - 子コンポーネントは
Component<***Dependency>のサブクラスにします。
Needle を使ったサンプル
雰囲気を掴むために、雑ですがコードを示します。
RootComponent.swift
import NeedleFoundation

final class RootComponent: BootstrapComponent {
    var point: Int {
        return 100
    }
    var featureABuilder: FeatureABuilder { FeatureAComponent(parent: self) }
}
FeatureAComponent.swift
import NeedleFoundation

protocol FeatureADependency: Dependency {
    var point: Int { get }
}
protocol FeatureABuilder {
    func showPoint()
}
class FeatureAComponent: Component<FeatureADependency> {
}
extension FeatureAComponent: FeatureABuilder {
    func showPoint() {
        print(dependency.point)
    }
}
これで子の FeatureAComponent の中で、親の RootComponent で定義した point にアクセスすることができています。Component<***Dependency> の中で dependency というプロパティが生えているので、これ経由でアクセスすることができます。
- 注:
***Builderという protocol を登場させています。Componentの protocol として定義しています。(後述)
AppDelegate あたりで先ほど触れた registerProviderFactories() を呼び出すことで Needle との接続を行います。
AppDelegate.swift
import UIKit
@main
class AppDelegate: UIResponder, UIApplicationDelegate {
    private(set) var rootComponent: RootComponent!
    func application(_ application: UIApplication, didFinishLaunchingWithOptions launchOptions: [UIApplication.LaunchOptionsKey: Any]?) -> Bool {
        registerProviderFactories() // Needle.swift で定義されている
        rootComponent = RootComponent()
        return true
    }
    // MARK: UISceneSession Lifecycle
    func application(_ application: UIApplication, configurationForConnecting connectingSceneSession: UISceneSession, options: UIScene.ConnectionOptions) -> UISceneConfiguration {
        return UISceneConfiguration(name: "Default Configuration", sessionRole: connectingSceneSession.role)
    }
    func application(_ application: UIApplication, didDiscardSceneSessions sceneSessions: Set<UISceneSession>) {}
}
RootComponent を経由して featureAComponent を取り出し、そのメソッドを呼び出して挙動を確認します。
SceneDelegate.swift
import UIKit
class SceneDelegate: UIResponder, UIWindowSceneDelegate {
    var window: UIWindow?
    func scene(_ scene: UIScene, willConnectTo session: UISceneSession, options connectionOptions: UIScene.ConnectionOptions) {
        guard let _ = (scene as? UIWindowScene) else { return }
        let rootComponent = (UIApplication.shared.delegate as! AppDelegate).rootComponent
        let featureABuilder = rootComponent!.featureABuilder
        featureABuilder.showMoney()
    }
}
実行結果:
100
雰囲気だけで申し訳ありませんが、 Needle は以上のような感じで (point が Component になった時とか、孫 Component を持った時なども同様に) 自動で DI することができます。
RIBs
今回のプロジェクトはあくまでインスパイアされているだけなので実際は使用していませんが、軽くどういうものが触れておくと、こちらは VIPER や MVC のようなアプリケーションアーキテクチャであり、フレームワークでもあります。
実際に使用する際は、uber/RIBs に則ってプロジェクトにインストールします。Xcode テンプレートも利用することができ、スクリプトを実行して Xcode にインストールすることで新規コンポーネントを作成するときに自動で必要なファイルが生成されるようになっているため、効率的に開発が進められるとのことです。
RIB
RIBs は Router-Interactor-Builder(RIB) が中心となったデザインになっており、RIB 単位でコンポーネントとして分割します。画面であればこれに View を付け足します。
- Router: RIB 間のやりとりを担当し、画面系の RIB であれば画面遷移なども担当します
- Interactor: ビジネスロジックを担当します
- Builder: Router / Interactor / View を作ります
- View: データを表示したり、ユーザーインタラクションを担当します
 出典: https://github.com/uber/RIBs/wiki/iOS-Tutorial-1
ルール
大枠のルールとしてはこのような感じです。
- 別 RIB にアクセスする場合は、Router から別 RIB の Builder を参照する
- 直接 View から Router にアクセスせず、Interactor で Router のメソッドへアクセスしてもらう
今回のアプリケーションアーキテクチャ(Needle + RIBs インスパイア)
ようやく本題です。
前述した Needle を使用し、RIBs の設計とルールを取り入れたアプリケーションアーキテクチャデザインになっており、Needle + RIBs インスパイアとこの記事では命名しております。(現場では特に名前をつけていません)

ベース部分の実装イメージ
あくまでイメージですが、RootComponent.swift や SceneDelegate.swift は以下のようになっています。
RootComponent.swift
import NeedleFoundation

final class RootComponent: BootstrapComponent {
    // DI
    var apiClient: APIClient { APIClient() }
    var errorLogger: ErrorLogger { ErrorLogger() }

    // 子コンポーネント
    var featureABuilder: FeatureABuilder { FeatureAComponent(parent: self) }
    var featureBBuilder: FeatureBBuilder { FeatureBComponent(parent: self) }
}
SceneDelegate.swift
import UIKit
class SceneDelegate: UIResponder, UIWindowSceneDelegate {
    var window: UIWindow?
    func scene(_ scene: UIScene, willConnectTo session: UISceneSession, options connectionOptions: UIScene.ConnectionOptions) {
        guard let windowScene = (scene as? UIWindowScene) else { return }
        guard let appDelegate = UIApplication.shared.delegate as? AppDelegate else { return }
        guard let rootComponent = appDelegate.rootComponent else { return }
        let featureABuilder = rootComponent.featureABuilder
        let window = UIWindow(windowScene: windowScene)
        self.window = window
        window.rootViewController = featureABuilder.viewController
        window.makeKeyAndVisible()
    }
}
AppDelegate.swift
import UIKit
@main
class AppDelegate: UIResponder, UIApplicationDelegate {
    private(set) var rootComponent: RootComponent!
    func application(_: UIApplication, didFinishLaunchingWithOptions _: [UIApplication.LaunchOptionsKey: Any]?) -> Bool {
        registerProviderFactories()
        rootComponent = RootComponent()
        return true
    }
    // MARK: UISceneSession Lifecycle
    func application(_: UIApplication, configurationForConnecting connectingSceneSession: UISceneSession, options _: UIScene.ConnectionOptions) -> UISceneConfiguration {
        UISceneConfiguration(name: "Default Configuration", sessionRole: connectingSceneSession.role)
    }
    func application(_: UIApplication,
                     didDiscardSceneSessions _: Set<UISceneSession>) {}
}
(Needle の紹介をしていたときに、 Builder という protocol を急に登場させていましたが)RIBs で言うところの Builder として Component は振る舞ってもらう、という発想に基づいて Builder と命名し、これを使って初期の画面を作成しています。
このとき、Builder はよく build() と命名されているメソッドではなく、エンドポイントの内容を示す意味で viewController を持つようにしています。
コンポーネント部分の実装イメージ
実際のコンポーネントは Builder、Interactor、Router (、View) で構成するので、コンポーネントごとにそれらの protocol と実装を作成し、ファイル分割します。(今回は雑ですが、コンポーネントごとにファイル分割して以下に掲載してしまいます)
FeatureA コンポーネントの View (SwiftUI) から FeatureB コンポーネントの View (UIKit) を画面遷移するサンプルを作ってみました。
ちなみに Interactor は今回は Router へのただの橋渡し役になっています。(API 通信やデータベースアクセスなどデータ処理・ドメインロジックが入るときはここで対応する)
FeatureAComponent.swift
import NeedleFoundation
import UIKit
import SwiftUI

// MARK: -
// MARK: Builder

protocol FeatureADependency: Dependency {
    // 説明用にここで注入。ただしこのサンプルであれば、FeatureAComponent の中で生成してもよい
    var featureBBuilder: FeatureBBuilder { get }
}
protocol FeatureABuilder {
    var viewController: UIViewController { get }
}
final class FeatureAComponent: Component<FeatureADependency> {}
extension FeatureAComponent: FeatureABuilder {
    var viewController: UIViewController {
        let navigationController = UINavigationController()
        let router = FeatureARouter(viewController: navigationController,
                                    featureBBuilder: dependency.featureBBuilder)
        let interactor = FeatureAInteractor(router: router)
        let viewController = FeatureAViewController(interactor: interactor)
        navigationController.viewControllers = [viewController]
        return navigationController
    }
}

// MARK: -
// MARK: Router

protocol FeatureARouting {
    func showFeatureB()
}
final class FeatureARouter: FeatureARouting {
    private weak var viewController: UIViewController?
    private let featureBBuilder: FeatureBBuilder
    init(viewController: UIViewController, featureBBuilder: FeatureBBuilder) {
        self.viewController = viewController
        self.featureBBuilder = featureBBuilder
    }

    func showFeatureB() {
        guard let viewController = viewController else { return }
        viewController.present(featureBBuilder.viewController, animated: true)
    }
}

// MARK: -
// MARK: Interactor

protocol FeatureAInteracting {
    func showFeatureB()
}
final class FeatureAInteractor: FeatureAInteracting {
    private let router: FeatureARouting
    init(router: FeatureARouting) {
        self.router = router
    }
    func showFeatureB() {
        router.showFeatureB()
    }
}

// MARK: -
// MARK: View

final class FeatureAViewController: UIHostingController<FeatureAView> {
    private let interactor: FeatureAInteracting
    init(interactor: FeatureAInteracting) {
        let view = FeatureAView(interactor: interactor)
        self.interactor = interactor
        super.init(rootView: view)
    }
    @MainActor @objc required dynamic init?(coder aDecoder: NSCoder) {
        fatalError("init(coder:) has not been implemented")
    }
}
struct FeatureAView: View {
    let interactor: FeatureAInteracting?
    var body: some View {
        Button {
            guard let interactor = self.interactor else { return }
            interactor.showFeatureB()
        } label: {
            Text("B 画面開けるかな 🤔")
        }.padding()
    }
}
FeatureB では View を Storyboard で作成しています。Storyboard の説明は割愛します。
FeatureBComponent.swift
import NeedleFoundation
import UIKit

// MARK: -
// MARK: Builder

protocol FeatureBDependency: Dependency {
}
protocol FeatureBBuilder {
    var viewController: UIViewController { get }
}
final class FeatureBComponent: Component<FeatureBDependency> {
}
extension FeatureBComponent: FeatureBBuilder {
    var viewController: UIViewController {
        let router = FeatureBRouter()
        let interactor = FeatureBInteractor(router: router)
        let storyboard = UIStoryboard(name: "FeatureB", bundle: nil)
        guard let viewController = storyboard.instantiateInitialViewController() as? FeatureBViewController else { return UIViewController() }
        viewController.interactor = interactor
        router.viewController = viewController
        return viewController
    }
}

// MARK: -
// MARK: Router

protocol FeatureBRouting {
    func dismiss()
}
final class FeatureBRouter: FeatureBRouting {
    weak var viewController: UIViewController?
    init() {
    }
    func dismiss() {
        viewController?.dismiss(animated: true)
    }
}

// MARK: -
// MARK: Interactor

protocol FeatureBInteracting {
    func dismiss()
}
final class FeatureBInteractor: FeatureBInteracting {
    private let router: FeatureBRouting
    init(router: FeatureBRouting) {
        self.router = router
    }
    func dismiss() {
        router.dismiss()
    }
}

// MARK: -
// MARK: View

final class FeatureBViewController: UIViewController {
    var interactor: FeatureBInteracting?
    @IBAction func dismissButtonWasTapped(_ sender: UIButton) {
        interactor?.dismiss()
    }
}
Demo
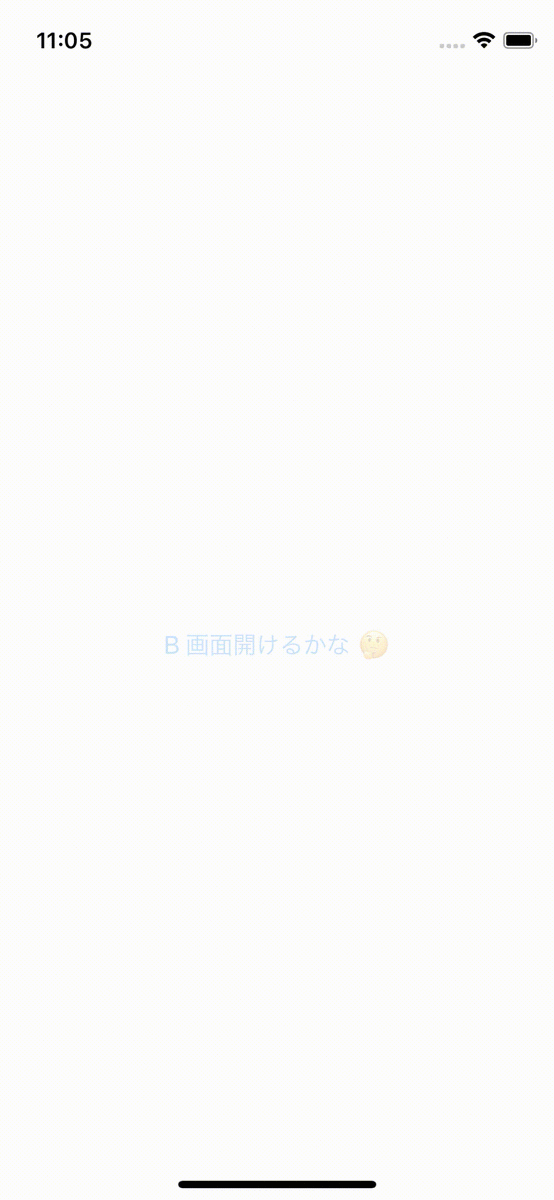
SwiftUI 画面 → UIKit 画面への画面遷移ができました!
Demo ソースコード一式:
ちなみに
- データモデル (Entity) などはこれらと別に
structを定義し Needle の管理下とは関係なくあちこちで利用します。
まとめ
- ライトウェイトなアーキテクチャである
- コンパイルセーフでバシバシ DI できる
- SwiftUI も UIKit でも柔軟に対応できる
よかったらお試しください!
是非読者になってください
メドピアでは一緒に働く仲間を募集しています。 iOS / Android のモバイルエンジニアも募集しています。カジュアル面談からでも OK です! ご応募をお待ちしております!
■募集ポジションはこちら
https://medpeer.co.jp/recruit/entry/
■開発環境はこちら